Getting ready for that first week of school is never easy. Like so many teachers, I wasted hours and ran into problems in my first years in the classroom. It took me a while to have a better beginning of the school year, but I figured how to make things run smoothly, and I’d love to share my best tips with you!
1. Word Walls on a Budget
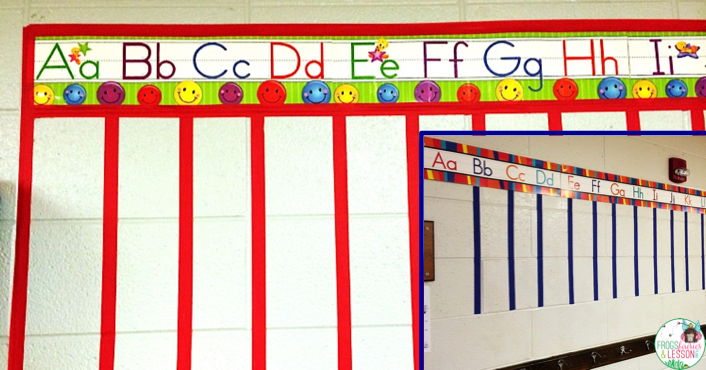
If, like me, you don’t have a large budget to decorate your classroom, you might want to try this approach when making your Word Wall.
I bought the Letter Border at the Dollar Store for… you guessed… $1.00! Then, I got Painter’s Tape at the hardware store to create the borders and spaces for each letter.
Besides being really inexpensive, it looks clean and uncluttered. Just the way I like it!
2. You’ll Thank me Later – Bulletin Board Technique
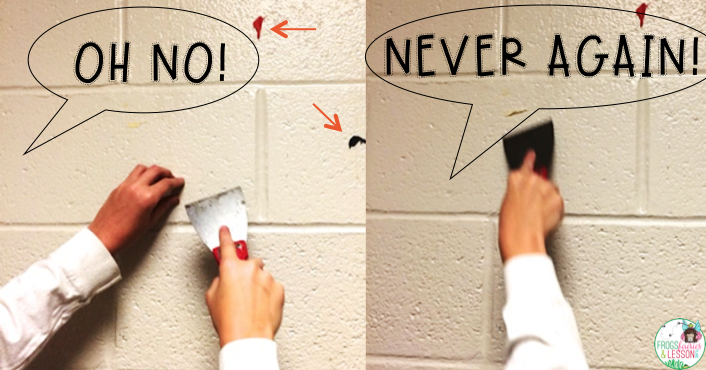
Have you ever had to scrape dried out hot glue from your walls on the last day of school? Fun, huh? All of my hot glue comes off the walls in seconds. LITERALLY! As in 1, 2, DONE!
The technique I’m going to show you only takes one extra step in the beginning of the year, and it saves you LOADS of time and broken nails at the end.
You can thank me later – ha.
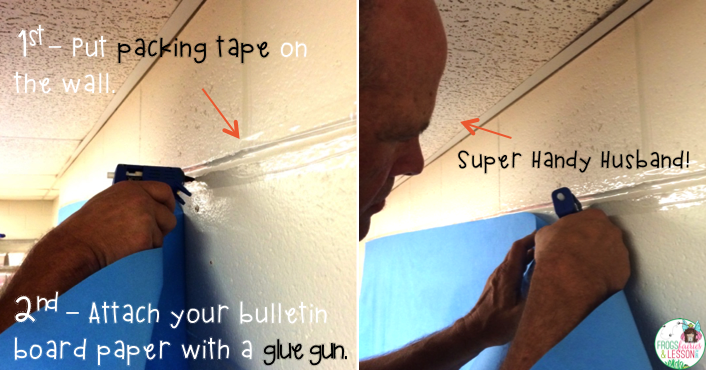
Steps
- Use packing tape to create a border in the dimensions of the paper you are going to use. Just eyeball it.
- Using a glue gun, attach the edge of the paper to the edge of the tape border you just made, and little by little continue to glue the paper to the tape. Avoid trying to cover too much of the tape so the glue doesn’t dry before you have a chance to attach the paper.
- That’s it. No step 3.
Now watch what happens!
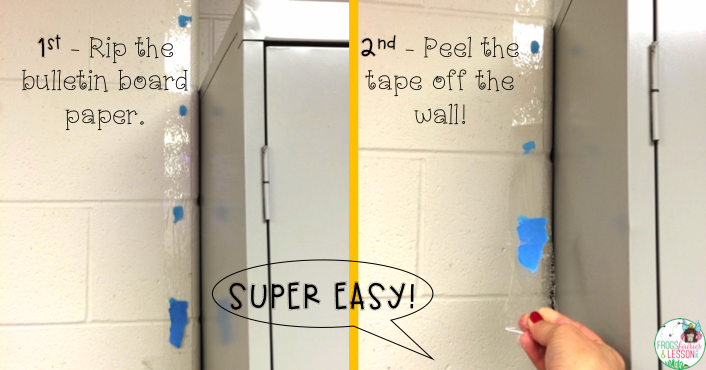
When you want to take the paper down, just rip it off. Then peel the tape off the wall! No hot glue mess for you!
3. Do This, Not That – Bulletin Board Paper Technique
Here’s another dreadful mistake I made when getting bulletin boards ready.
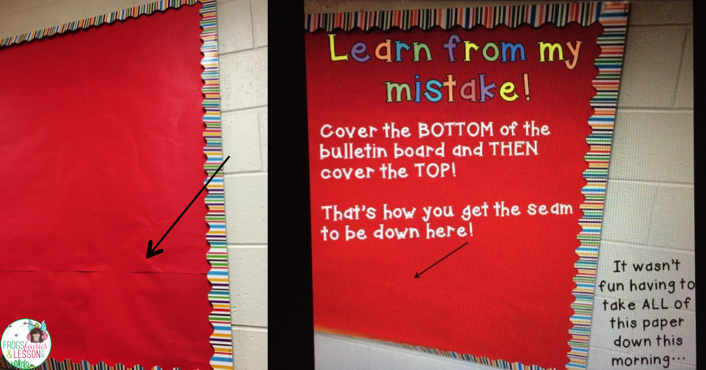
I think most of us will naturally start by covering the top of the board, then finishing the bottom, right?
BAD MISTAKE, my fellow teachers! If you do that, that UGLY paper line will be right on the top where it is SO noticeable!
Cover the BOTTOM FIRST, then put the top layer on. The ugly paper line is now in the bottom where it is less visible.
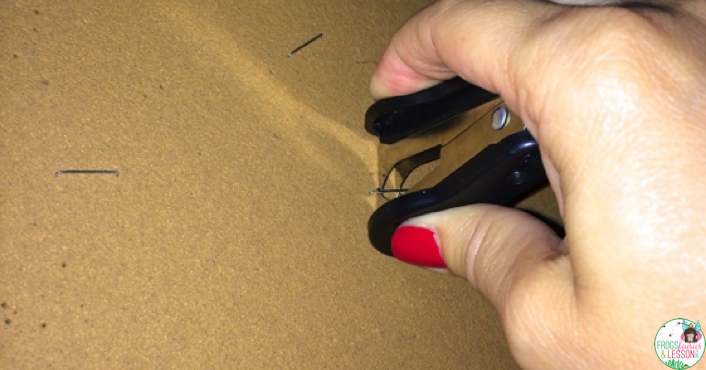
Also, don’t forget to get all of those staples out! There’s nothing more annoying that feeling all the bumps that they make under the newly laid bulletin board paper!
4. first week of school Community Building Activity
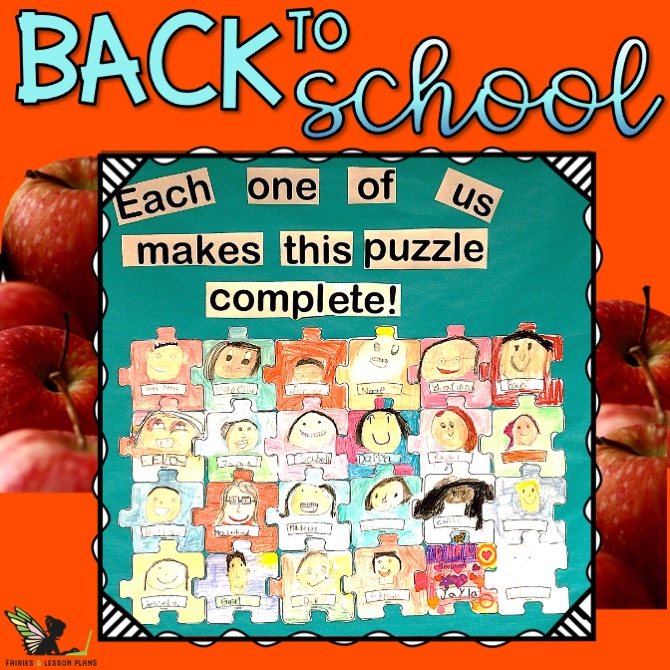
I do this activity on the first week of school, and I leave it up the WHOLE YEAR. Each student makes a puzzle piece with their face and name, and I create a big classroom puzzle with all of us. This back to school activity is one that the kids cherish, and on that, if used correctly, can in fact help build a strong classroom community.
I use it to reinforce the concept that we are like a family in our classroom: “When someone is absent, our puzzle isn’t complete, when someone misbehaves, the whole class is affected. But, when we make good choices, the good feelings spread around the room, and when we work together as a team, we bring the whole class up to the next level!”
The kids buy into that idea. All I have to say is “Are your choices helping or hurting or classroom family?” or “Thank you for helping everyone in our classroom family feel good.” It helps me maintain a loving atmosphere in my room all year long.
Let me send you the template! When you sign up, you’ll receive this template, my tips, and other goodies that I only send to teachers on my mailing list. I will not spam you, and it’s super easy to unsubscribe if you’d rather not hear from me!
5. Keypad Practice For Younger Students
Do your students need to learn their Student ID number to get lunch in the cafeteria or to get a book at the Media Center?
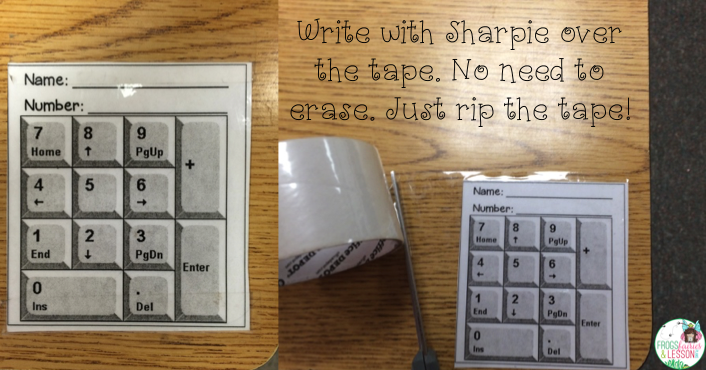
I get these laminated before school starts, then tape them to my students’ desks using packing tape.
Make sure to write their names and numbers with a SHARPIE because the dry erase markers will… well… erase.
You won’t need to make new copies for next year because you wrote over the tape, not over the keypad itself! Just remember to take those down as soon as your kids don’t need them or they will be destroyed by the end of the year.
During transition times (between ending a lesson and starting another or even during dismissal time), I ask my kids to type their numbers on their keypads. They LOVE it, and they learn it quickly!
Those pads are part of my 1st Grade All Set for Back to School packet if you are interested.
6. Do it Now, Do it Later – back to school Bulletin Board Idea
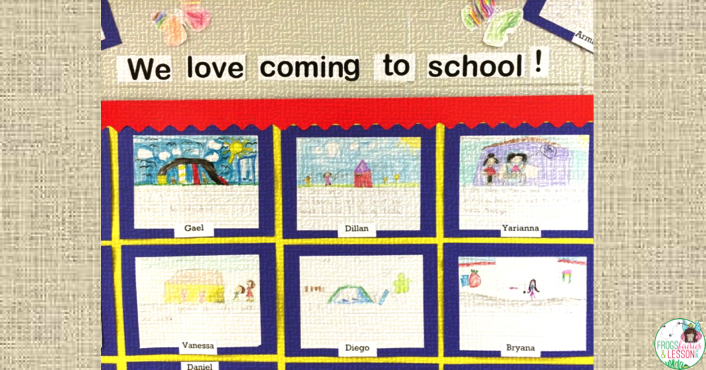
My first Bulletin Board that goes on the hallway is this one. I have kids draw and write about why they love coming to school. Parent love reading what their kids have to say.
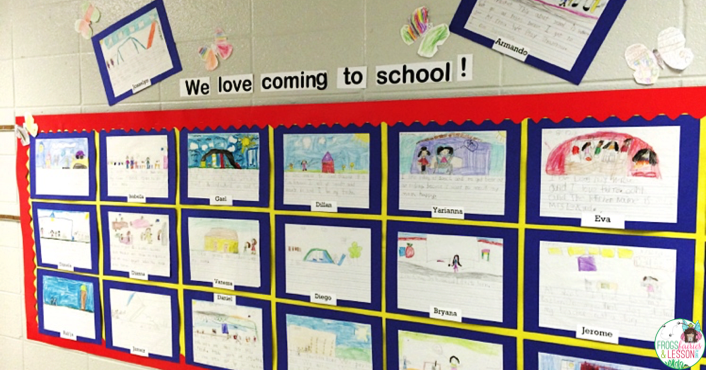
At the end of the year, before the Big End of The Year Party, I give the kids the same prompt. This time, I hang the beginning of the year and the end of the year prompts side by side. It’s so rewarding to see how much growth happened in only a year! And of course, the parents love seeing that too!
I hope an idea from this post saved you some time and made things a bit easier for you this year!
For more back to school tips go to:
- Back to School Tips and Activities – Vol. 2
- Control Pencil Chaos Once and For All!
- A 3-Step Plan for Collecting Supplies
- 20 Questions to Ask Yourself When Preparing for the 1st Day of School
For these first week of school Resources click on the links:

Question..will the packing tape stay attached to cinder blocks? My cinder block walls drive me NUTS. Thank youuuu! 🙂
Hi Alissa! YES! The packing tape sticks beautifully to that horrible cinder block wall! Just lay it flat on the wall and rub it well so it sticks. Then, put hot glue right on top of it! Life changing!!!
Good luck!
Adriana
Painters tape works well too.
Does the packing tape take the paint off the wall?
Good question Leslie! I never had the packing tape take the paint off the wall, but that could be different for each one of us! My yucky, grey, cinder block walls can't be destroyed (hahaha).
I feel like the painters tape works on cinder block sometimes… It's not just the cinder block that complicates things. It also depends on what type of paint your school choses to paint the cinder block. I've been at schools where packing tapes works and at schools where it fails miserably. Just keep trying things if it doesn't. I was at one school where shiny (not matte finish) scotch tape was the only thing that worked. Go figure.
P.S. Thanks Adriana for the GREAT blog post! I'm totally going to use your ideas this school year!
The janitor at our school let us use hockey tape it doesn't take the paint off
Tape is great idea, but doesn't work in areas with high humidity. If we had central air conditioning, it might be different, but with a window unit it doesn't really work. The only thing I've found to work on cinder block in this situation is the hot glue.
We have the cinder blocks at our school and we found that Book Tape holds wonderfully to the walls and doesn't damage the paint… this is if the paint has been there longer than sixty days, in order to cure.
These are awesome tips!! I just shared them on Pinterest! Thanks for a great blog post. I'm going to try hanging my bulletin board paper like you suggested 😉
TheHappyTeacher
Hi Liz! What an honor to have you share this post! I can't wait for you to hang your bulletin board paper!
The things that make a teacher happy 😉
Another tip for writing on laminated items – you can actually erase the permanent marker by scribbling over it with a dry erase marker. It works on any laminated surface (and even on classroom desks or tables. As long as the surface is smooth the dry erase marker will erase the permanent marker) I do this for my cubby labels every year. I laminated them a few years ago and I've used them 3 years in a row now. I erased them when school ended in June and they all look good as new and are ready for me to put this years names on them. I do the same for special dates on our calendar and a bunch of other things. It's great.
That's such a great tip!
Thanks for sharing it here!
I hope you have a great school year 🙂
Adriana
You can also use 91% isopropyl rubbing alcohol to remove permanent marker from a smooth surface. Saves the dry erase markers 🙂 it's also good at getting dried acrylic paint out of clothing 🙂 thanks to all you teacher/heros! It's not a job, it's a calling! 🙂 Julia
A little sanitizer (the alcohol kind) works in a pinch to remove sharpie from the plastic.
Thank you thank you!! I made that awful mistake with the glue gun. Spent 1.5 hours getting it all off.
I have a tip: once you hang your paper, use the packing tape to make vertical stripes about every 8 inches. Then when you hang the kids writing/art you can use masking tape on the packing tape. When you want to change up the display, it rips off without ripping the bulletin board paper.
Oh!!!! That's fantastic!!!! Can you see me jumping up and down? I hate when the bulletin board paper rips!
Thank you Liz for sharing that here!
Have a fabulous school year 😉
Adriana
Another idea to cover bulletin boards is to use plastic table clothes found at the party store. They don't fade and there are no unsightly lines.
Hi Peg!
Thank you for sharing the plastic table cloth tip with everyone here! I'm loving all the new ideas that I'm getting from this post!
Adriana
I teach four classes of math. This year to display student work, I put up four different colors of bulletin board paper along a blank wall and strung three levels of "clothes lines" over the top using Command hooks. The students can hang their own work with the colorful plastic clothes pins I bought at the dollar store. Thanks for the tip about hanging paper with packing tape and glue gun! That will be what I use this year rather than Sticky Tack to hang posters.
That's such a great idea! It gives the kids a sense of ownership and pride when they get to choose the work they want to display, don't you think? I love Command Hooks as well 🙂
Thank you so much for sharing a bit of what you do with all of us here! Have a great year!
Adriana
Great ideas for all of the teachers getting ready for the new school year. Best wishes you you and your class.
Beti
Betikempa1.blogspot.com
Hi Beti! I'm glad you stopped by and chimed in with a comment! I hope you have a fabulous school year as well 🙂
Adriana
Hot glue!?!? I have never seen or heard of this one! Thanks for the ideas.
Yes! Hot glue! You can purchase a "hot glue gun" at a craft store, and I'm pretty sure at any home improvement store… They are super easy to use and will glue pretty much anything 🙂
Have a great school year and thank you for chiming in the conversation!
Adriana
When I got my first classroom (four years ago) I followed a tip to use cheap bedsheets to cover bulletin boards. I used black ones from walmart and laminated some colorful borders to go around. The boards still look awesome after all of this time! I had my husband staple gun the sheets in place and I have only had to redo the hot glue in a few places to keep the border up. By the end of the year the black sheets look a little dusty so I use a lint roller all over them and they're good as new!
Hi Jessie! You surprised me with the lint roller idea! What a great way to keep the sheets looking fresh! Thank you so much for chiming in with this comment!
Adriana
Sometimes you can use a hair dryer on the hot glue to help remove it, again, it depends on your wall. We hot glued stuff to untreated bricks and the glue seemed to go through some kind of chemical bonding with the wall. Fortunately, it didn't show (unless you knew where to look!) Another thing to look out for (learned the hard way) sticky tapes or Contact Paper will sometimes remove the finish from varnished doors or furniture.
Wow! You brought up things I didn't know! Using a hair dryer is such a good tip if you already have the glue on your wall! And it's good to know that you can pull the finish off furniture with sticky things. Thank you so much for showing up and sharing with all of us!
Adriana
A quick iron over the students papers that I hot glued to the wall took them off quickly!
Brilliant! I would never have thought of that! Thank you so much for sharing this idea here Kathie! Have a fabulous 2017!
Have you ever tried the flat staple removers that scoop up the staple. They are a life saver! So much easier than the claw ones, and if you still have paper on the bulletin board it’s less likely to rip it.
Also, fingernail polish remover takes sharpie off anything plastic or laminated just in case you get it on any plastic or you want to change the label on anything.